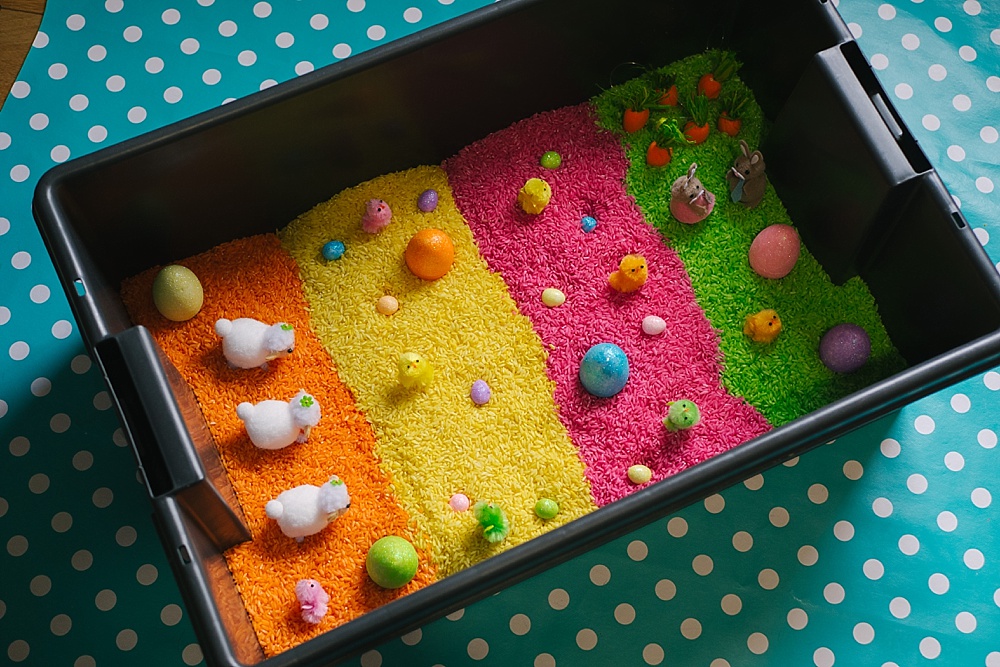
 This is the easiest way to dye rice for sensory play that you will ever find! And it makes the most vibrant colourful rice, without the mess and smell of other methods. Perfect for sensory play and other educational activities for toddlers.
When you look for sensory tray ideas and tuff tray set ups on Pinterest you will see a huge amount of them including coloured rice or other dyed dry foods. They looks so pretty and inviting to kids (and adults!) and make for great educational set ups kids will love playing with.
When I first did this method the whole sensory play thing was all new to me, but Elian loved his Sensory class as a baby so I thought he would enjoy playing with some sensory tray set ups. When I started looking at ways to dye rice most of them seemed to include adding food colouring gels, vinegar or alcohol gels to get the colour to set. It seemed complicated and often people were mentioning how the rice ended up smelling of vinegar and the babies not being able to safely put it in their mouth.
I saw a few people on Facebook saying you could simply use non-toxic poster paint to safely dye rice for sensory play so I thought I would give this method a go. It is honestly the easiest way to dye rice for sensory play and it makes the brightest most vibrant rice you could ask for.
What you will need
- Dry Rice (Some like this)
- Non-Toxic Poster Paint (We bought this multipack)
- Zip Lock Bags (I like these big ones)
- Tray (I use disposable ones like these, but keep them for more dying in future)
How to dye rice for sensory play
This is honestly the easiest way to dye rice that you are going to find on the internet. Most techniques seem to use vinegar or other setting agents to make food colouring stick and get absorbed by the dry rice. This method simply requires poster paint, which means you can have coloured rice in under 30 minutes and it is odourless and non-toxic. Plus the range of colours you can achieve is huge.
- Add a cup or 2 of rice to a freezer bag
- Add a large dollop of your desired paint colour to the bag
- Seal the bag, try to squeeze out most of the air first
- Now the fun bit! Simply move the rice around in the bag so it gets coated in paint, you’ll be surprised by how little paint is actually needed to coat all the rice and give it a really vibrant, saturated colour. If you have older kids they can help with this bit.
- Spread the rice out on a tray and set aside for it to dry, usually takes around 20-30 mins. I found moving it around a little after about 15 minutes helped it dry a little quicker and stopped it from drying in clumps.
- Once its dry its good to go! Enjoy some fun rainbow rice set ups and sensory trays.
- Store the rice in a dry sealed container and it will last indefinitely. It can be used again and again for lots of fun set ups.
Ways to use dyed rice for sensory play
As you can probably tell this particular sensory tray for us was set up as an easter play tray, including different sized eggs, some chicks, bunnies, sheep and carrots I found in the pound shop. I added his usual scoops, measuring spoons, funnels and a few self fillable plastic eggs to his play box and this kept him entertained for a little while each day over the course of a week. Of course the rice was thoroughly mixed by the end of the week but I’ve saved it all and we use it for lots of other rainbow sensory trays. But if your looking for a few ideas on how to use dyed rice in your tuff stop set ups you’ll see a few ideas below
- Beautiful Rainbow Rice Sensory Tuff Spot
- Coloured Rice Sensory Star Tuff Tray
- Ocean Sensory Tray
- Tiddler Rainbow Rice Tuff Spot
- Candy Cane Sensory Bin
- Witches Brew Sensory Bin for Halloween
- Earth Day Sensory Tuff Stop
If you love this post don’t forget to PIN IT!


