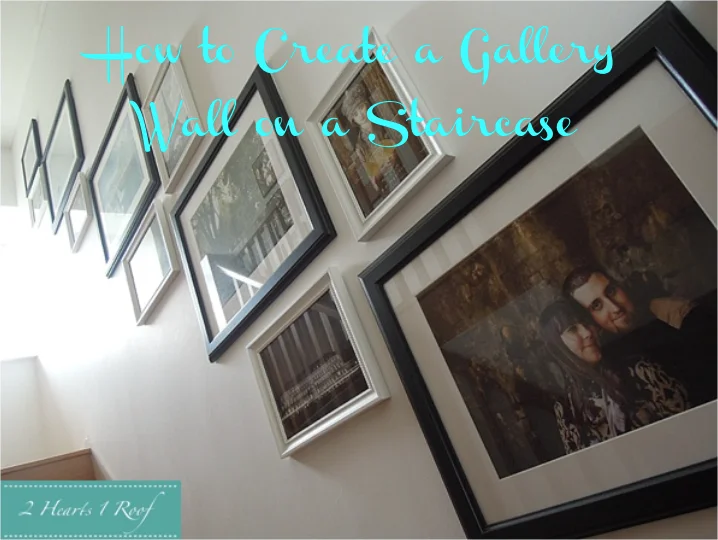
 When we first saw the house, with all it’s white walls and open space we knew it would lend itself well to our design aesthetic and style. I had always loved the idea of picture walls on staircases, after seeing one many years ago on Pintrest. Sadly Jon wasn’t as convinced, he simply thought of the Osbourne’s home when thinking of them. Luckily he has since come round to my thinking and now we couldn’t be more happy.
When tackling a picture wall on a staircase it isn’t as simple as just whacking up your photos in any way, it actually takes a bit of thought, coordination and a tape measure, at least it does if you want it to compliment your stairs and flow well. I had seen many different methods while researching how to do this on Pintrest (some involving large quantities of masking tape and giant sheets of graph paper!) but the main tip that was coming up again and again was to do with a central focus line. So we started with that idea and went from there.
Here is our quick and simple guide on how to create your own great looking staircase picture wall.
What you will need:
- Picture frames
- Command Strips/picture hooks/etc (plus hammer/drill if you need it)
- Measuring tape
- Small Spirit Level
- A second pair of hands is helpful
First step is to collect all your picture frames (or at least the largest ones you will be starting with) they don’t need to have prints in them yet, that is something that you can add over the following days/weeks/months. We bought our starting ones in Ikea as we liked the simple but good quality frames, and they are well priced (the large black ones were £13, and the white £6 – £10). Choose frames that will compliment each other, but in a range of sizes.
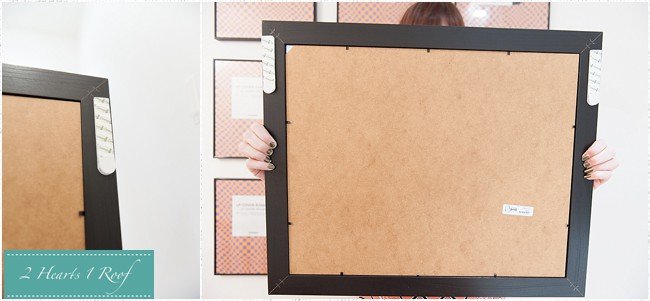
Next you will need to decide on your method of hanging. As we have solid stone walls we didn’t want to start drilling or knocking holes into them, so decided to use 3M Command strips (which we have now used to hang all the pictures in our house). They come in a range of sizes to hold a variety of weights up to 7.2Kg. We hadn’t used them before, so it was a bit of a trial, but after having our wall up for the past few weeks, we wouldn’t hang pictures any other way in the future, they are brilliant.
So if you are using Command Strips or something similar you will want to check how many pairs you need for the weight of your frame and add them to the top or top corners of the frame as in the image above.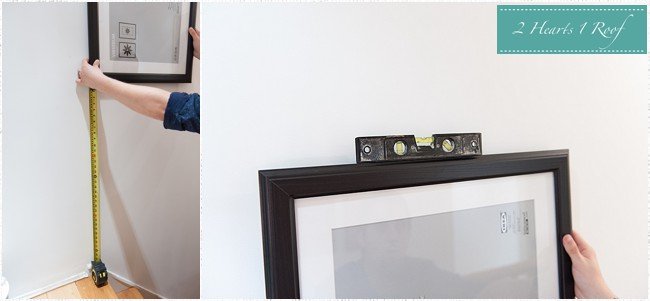 Next you need to decide what hight you want your central larger frames, these will run evenly spaced up your entire staircase. This helps you get a central focus point and allows the pictures to flow better with the incline of your stairs. To do this we did a dry run, placing the first frame against the wall and testing at which height we liked it best. Once we were happy with the height we took a measurement from the bottom left corner to the step below, we then tested this measurement again with a frame at the top of the stairs, simply to make sure we liked where the placement would be at the other end. Once happy we went back to the bottom and lined up the frame again at the same measurement (take off the backing of the command strips first, but be careful not to press them against the wall until fully lined up), then using the spirit level we made sure the frame was level, then simply pressed the strips against the wall for 30 seconds to adhere the frame in place. You will need to peel the frame off the wall again and leave the command strips for 1 hour before hanging the frame again.
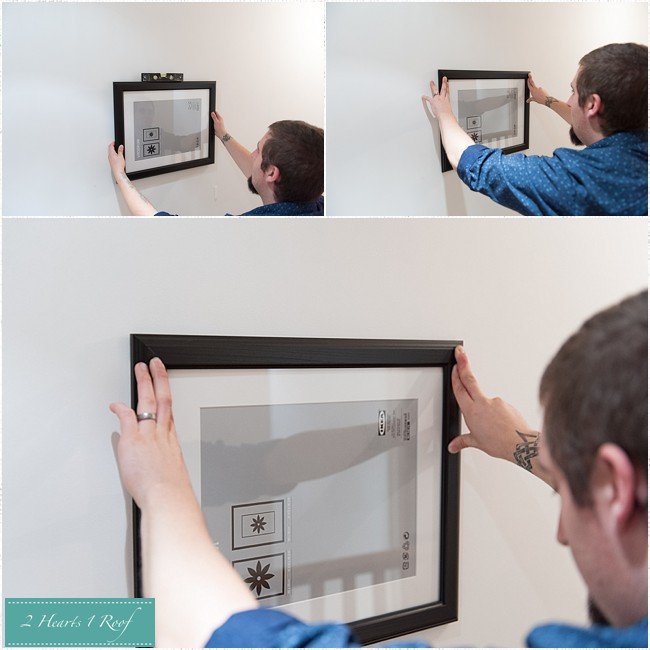 When the first frame is in place you will need to decide how much of a gap you want between your frames, this can be a little trial and error to see where they sit together best. Ours are almost on a diagonal, corner to corner, with around a 1.5-2inch gap between them. Once you have figured this bit out, you need to measure again from the bottom left corner to the step below, adjusting the height of your frame accordingly to make sure the measurement is the same as the frame below, this is to keep the streamlined look. Then repeat steps to get the frame level and adhered to the wall.
Repeat this process all the way up the centre of your wall with your large frames until you reach the other end and you have a lovely equally spaced and steadily inclining row. Thats the difficult part all done and dusted. Now you can take the smaller frames and start adding them in around your central line. You don’t need to keep all the other frames in a specific pattern or orientation, due to the central focus line as long as you add similar amounts around the larger frames it will keep the wall looking ordered and sleek.
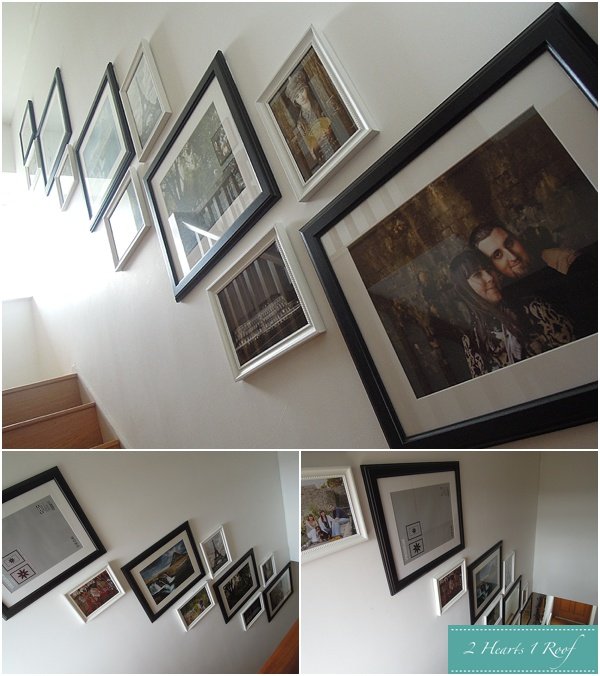 We decided to use black frames for our central line and smaller white frames around, this was to help give the wall even more of a pop and to draw the eye upwards. We originally wanted black frames but thought a whole wall of them would be too heavy but a whole wall of white may blend too much with our pure white walls, so this compromise worked really well. As you can see we haven’t finished adding images yet, it is a work in progress and we still have a stack of white frames to add when we have images to put in them.
So there you have it, a picture wall on a staircase guide. Hope this helps you create your perfect picture/gallery wall in your stairway. We would love to see pictures of yours if our guide helps, so please leave your links below.


This is really lovely, Chantelle. I’ve been meaning to do this for years but wasn’t sure where to start so this is really handy. Thanks x
Glad I could help, it was literally one of the first things we really did to start decorating the house properly, getting pictures on the walls makes it feel more like home! Let me know if you do it, would love to see how it looks
Gallery walls are no easy feat but you guys make it look so easy! I’m going to have to try these Command Strips!
Im a little in awe of Command strips in all honesty! They have been amazing in doing the wall and all the other pictures in the house.
Wow, that is one impressive look with your design. I, too, am a huge fan of 3M command strips! Thanks for joining the DIY Blog Hop!
I am going to put this on my husband’s “honey do” list.